Showing posts with label black and red coat. Show all posts

Thursday, February 3, 2011

Creating the new Autumn Collection Part 3: A New Jacket Style


The very latest Penelope Red design is a new jacket style. This style is completely different to all of my other jackets and coats, having a fitted bust and waist area, centre front meets edge to edge, 3/4 sleeve with contrasting detail, and a full flared hip with contrasting detail. The jacket hem will sit around your hips.

I have tken a few photos and wanted to share them with you...


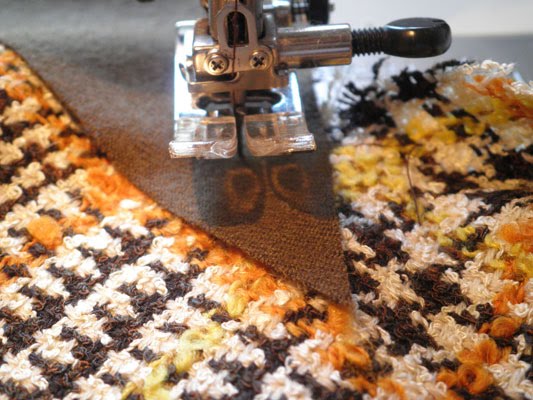
Above and below, sewing the contrasting panel into the sleeve.


When I create the Penelope Red wool coats and jackets, I use interfacing instead of fusing. It is a much better product, it creates a higher quality finish, and I feel it looks better too. You can see the interfacing in the next two pictures.

Below, the inside of the back...


...and the inside of the front.


Sewing the hip area to the waist, and below, sewing the sleeve to the body.


I always like to use contrasting lining- it is more exciting that way! Above, I am sewing the lining together.


When I create wool coats and jackets, I always make sure I clip and trim the seam allowances- this creates a much better quality finish.


Above, you can see the inside of the jacket as I am sewing the hooks and eyes onto the centre front.

This jacket has been made from a brown, cream, yellow and orange wool boucle for the main fabric, a brown wool twill for the contrasting and orange silk for the lining.

I haven't even named this design yet! I am currently in the middle of organising the photo shoot for the Autumn collection, where this jacket will take centre stage- so really looking forward to this range coming together!

Friday, August 6, 2010

Teena's Black, Red and White Winter Tailored Coat: A one- of a kind design!


A few weeks ago, I received an order for one of my Winter Tailored Coat's. I met Teena at The Rocks Markets, where I took her measurements, then we discussed colours. We agreed on a palette of black and red with a hint of white. Since Teena lived in Perth, and I lived in Sydney, the fabric samples to were posted to Teena, and once approved, the coat became a reality!

The photos below show some of the steps taken to create this beautiful hand made, one of a kind coat...


Cutting out the Red silk lining


Cutting out the black wool


Sewing the black wool pieces together (above), and sewing the red wool and cotton interlining together. I add interlining to all of my coats to give it extra warmth and durability.


I decided to add white/ivory piping to the design, as it really made the red and black contrast and stand out even further. It gave the colours a dramatic edge and oomph! I made the piping from some cotton roping and ivory silk, cut on the bias.


As you can see above, the piping really makes the red and black stand out! I like it how it also makes a very graphic and almost pop art look to the coat. This is a photo of the sleeve.

Below, the inside of the coat, where the side pocket sits.


Above, the finished side seam- including the pocket.


Sewing the white piping to the red wool, before it is attached to the black wool.


Above and below, creating red piping for the button holes. I decided to use red piping in this case, as the buttons are already black and white, and I thought if I used white piping, there would be too much white in that area, and the buttons would not stand out enough.


Creating the welt button holes. I always make big stitching lines to guide me, then I sew in place the piping. Just to create this part of the button holes takes me around 90 minutes for about 5 button holes- then I still need to hand stitch the seam allowance of the piping down, and finish off the under side of the button holes. A very time consuming exercise, but the finished product is well worth it!


Sewing the interfacing to the bottom of the red wool- this is for the hem, and it makes it sit nicely every time you wear it!


I apply the fur collar to the lining, so I need to hand stitch the collar seam allowance down, otherwise it will not sit flat.


A little extra added detail: I decorated the lining with white embroidery!


And the finished product!....


And a few lovely comments from the customer:

" The coat has arrived and it is absolutely perfect. It is beautifully made and your attention to detail is amazing. I really am thrilled with it. " from Teena in Perth


I am very happy with the finish of this coat- it was very hard sending it off- as I really wanted to keep it for myself!.... Luckily, it wasn't made to fit me!