Last week, I needed to create another
Penelope Red Venus Floral Bolero for an order, so I thought it was a good opportunity to show you the "making of" this new design...
First I cut out all of the "main" pattern pieces from the vintage cotton floral fabric.

Next I cut out the fusing; this is a stiffening which you iron-onto the main fabric. By the time I cut out the vintage cotton, the fusing and then the lining, it takes a while!

Once the fusing is attached to the floral cotton, I then start to sew as many seams as I can.

In some areas I can attach the lining to the facing pieces.

To keep the neckline from stretching, I place some stay-tape around it.

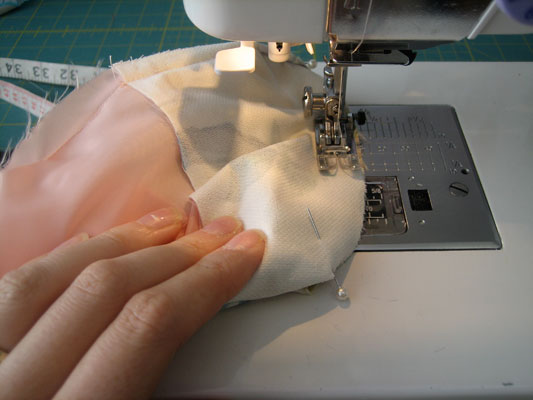
Next, the sleeves need to be fitted to the armhole. To do this, I place a gathering stitch around the sleeve-head, then I slightly gather it up to fit, and then use the iron to steam it. This shrinks the gathering and prevents puckering.

Once the sleeve-head is steamed, I pin it to the armhole, then I sew it in place.


Then I can focus on the lining and sewing the jacket together.

I like the lining to be just as neat as the outside, so I trim the seams to be neat, and press them flat.

I like to match up all the seams as best as possible too- including the lining.

Now that the lining is ready, I need to insert the pretty pink pleated frill around the neckline of the jacket, before I sew it all together. I create this pink frill from another vintage fabric. It is a large roll of pleated material, which I cut the edging off- this is what I use on the bolero.

Once the frill is attached to the jacket, I then sandwich the layers with right sides together, and sew around the entire edge.

I then trim and clip all seams, as it creates a better finish. Then the whole jacket is turned out through a gap in the lining seam- a little handy trick I learnt in college! This is where it really gets complicated!

Once it is turned out and the neckline has been under-stitched, I then need to finish off the sleeve hem. I do this by turning it inside out, through the same gap in the sleeve lining. It is too hard to explain, so just take my word for it when I say that is where my years of sewing experience comes in handy!

I like to use a contrasting blanket stitch on certain designs. I think it adds a certain handmade quality, while still looking chic and individual. In this design I use a bright pink thread to tone back in with the flowers in the print and the pink frill.
When I bought my sewing machine, I thought I was never going to need all of those fancy stitches that it can create. Now I am so glad they are available, as I think when I use them on my designs, it sets them apart from the rest.

By this stage it is practically done. All I need to do now is place the tiny hook and eyes onto the garment centre front. This is done by hand, and I even make my own little eyes with thread.


And the completed
Penelope Red Venus Floral Bolero is done! You can purchase a copy of it in
my etsy shop here.